SSO/AUP: Troubleshooting SAML Responses
Purpose
This guide explains how to use SAML Tracer (a browser add-on) to capture and inspect SAML responses, with a focus on finding the SAML attributes sent to Clumio. Performing the steps outlined in this document will help confirm if the necessary attributes are being sent to Clumio.
Prerequisites
- Clumio account with Super Admin Role
- IdP admin privledges (not required for troubleshooting, but required to make changes to the IdP)
- A browser with SAML Tracer installed.
Step 1: opening/ configuring SAML Tracer
- Open your browser.
- Click the SAML Tracer icon in your toolbar to open the panel.
- Leave it running; it will automatically capture HTTP requests and responses.
- Take note of the clear button on the top left corner, and clear the logs as needed.
- If you wish to use it in a private browser i.e. incognito. You will need to allow this in the extension/plugin settings.
Step 2: Initiate the SAML Login
- In the same browser session
- Navigate to Clumio's login page if SSO is already configured and you are troubleshooting SAML based Auto User Provisioning. Or
- Click "Test with my account" in the SSO configuration page if SSO is not yet configured.
- SAML Tracer will begin capturing the authentication flow.
- Once the logs are successfully captured, click on "Pause" on the top left corner of the window to stop capturing traffic data.
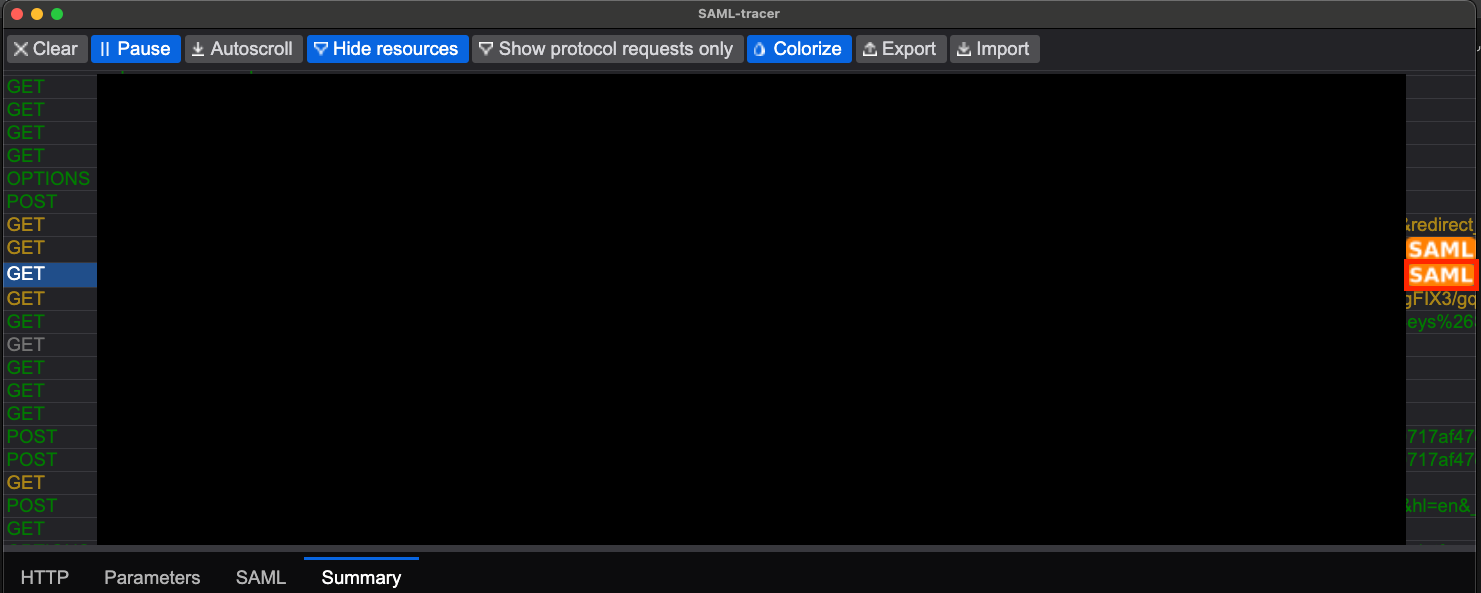
Step 3: Identify the SAML Response
-
Identify the log entries that have SAML tagged. The entry of interest is the 2nd one as shown in the screen shot.
-
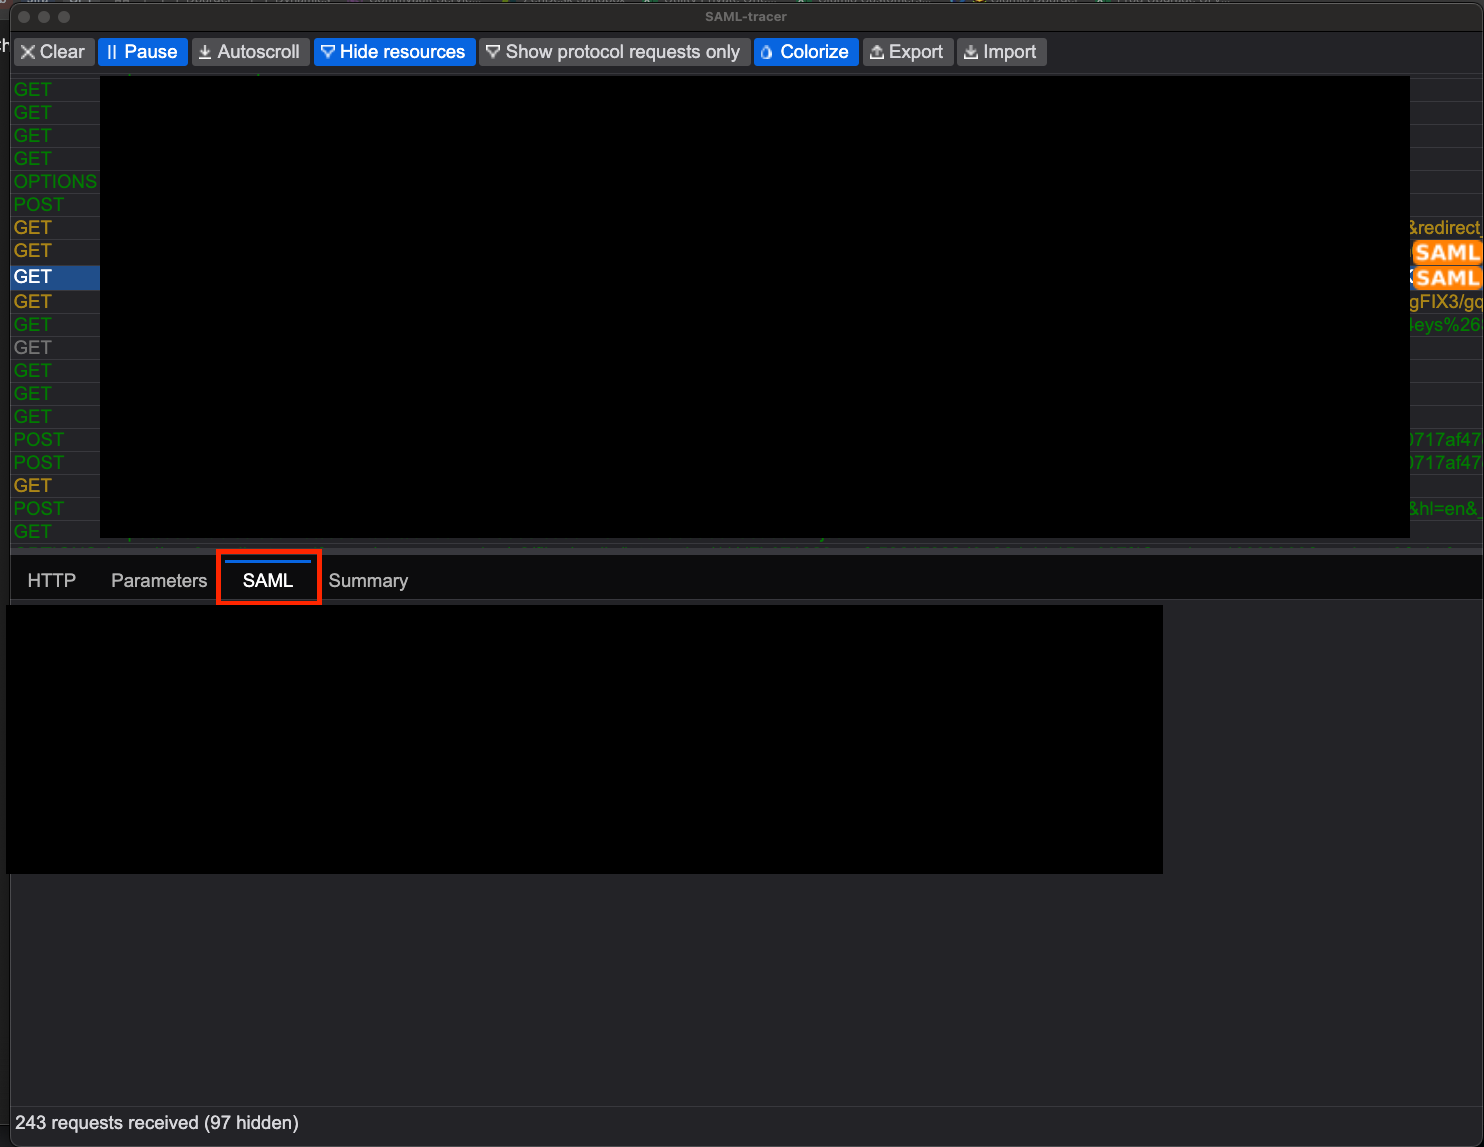
Once the log entry is selected, select SAML on the bottom tables header.
-
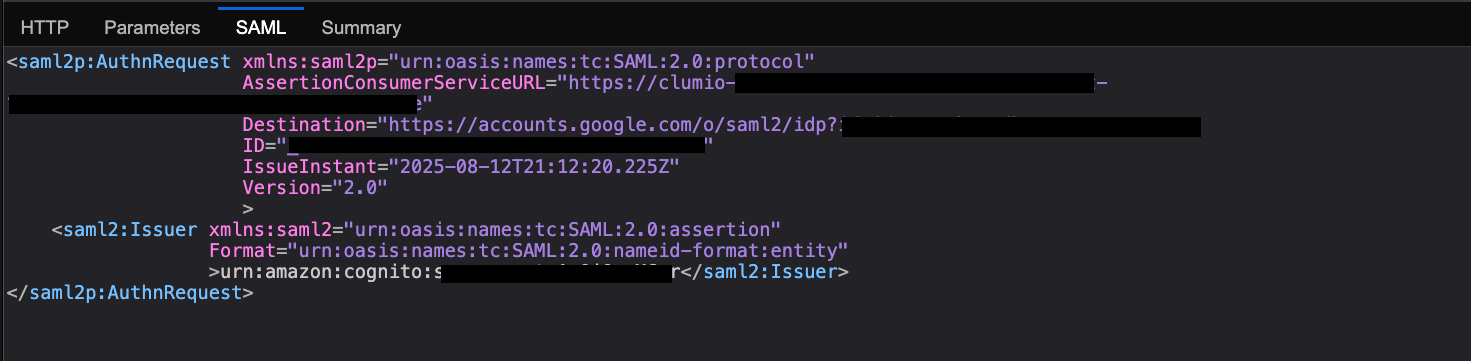
The screen shot below shows an example of a SAML response that would not work. Notice how no email attribute has been sent. In the case of groups, the list of groups should also be sent in the assertion.
-
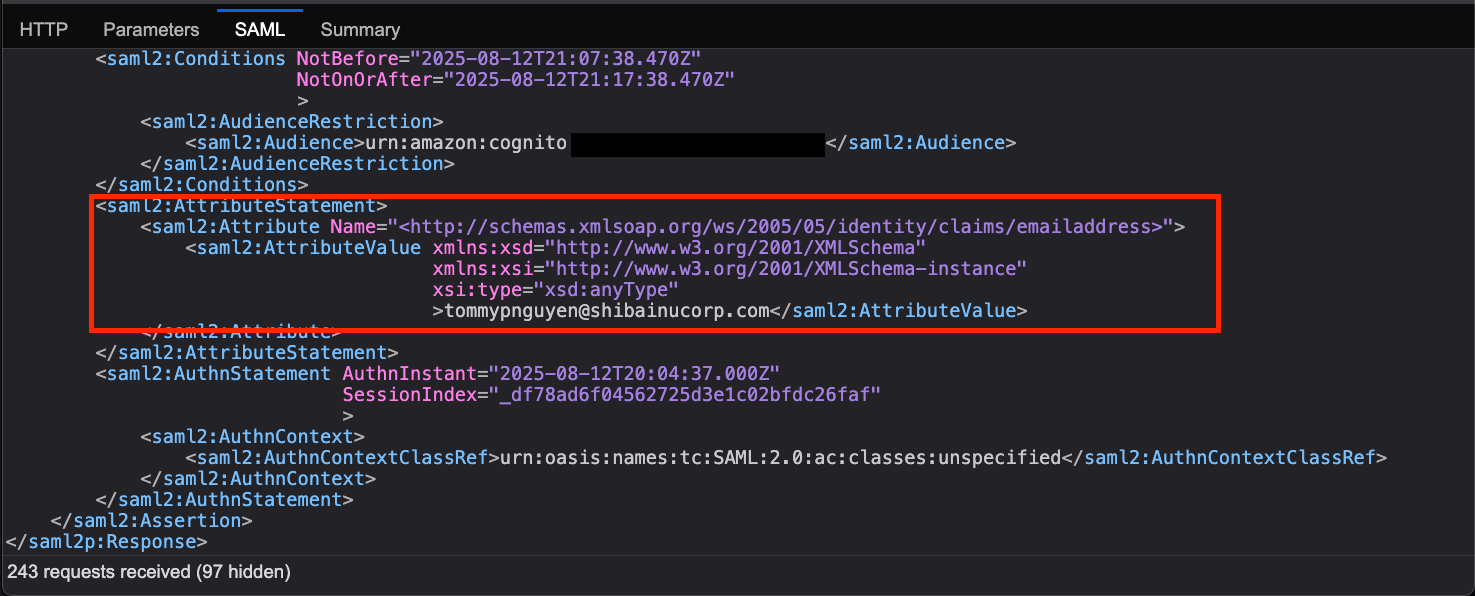
The below is a successful example where we see the email attribute is being sent in the assertion.
Updated 22 days ago