Configuring SSO for Okta
The Clumio service can integrate with Okta for seamless user authentication. Please follow the below steps to configure Okta IDP as a Single Sign On service for Clumio. More details about the Clumio App here.
Prerequisites
Ensure that you have the following before you start configuring Okta**
- Okta account with admin privileges
- Clumio account with Super Admin Role
Supported Features
- Idp initiated SSO
- SP initiated SSO
- Just-In-Time provisioning
Enable Okta Integration with Clumio
In Okta
- Open the Okta Admin console.
- Go to Applications.
- Browse the App Catalog and search for Clumio.
- Click Add.
- For the Application Label, name the application Clumio.
- Click Done and assign the application to the users.
- Click the Sign on tab.
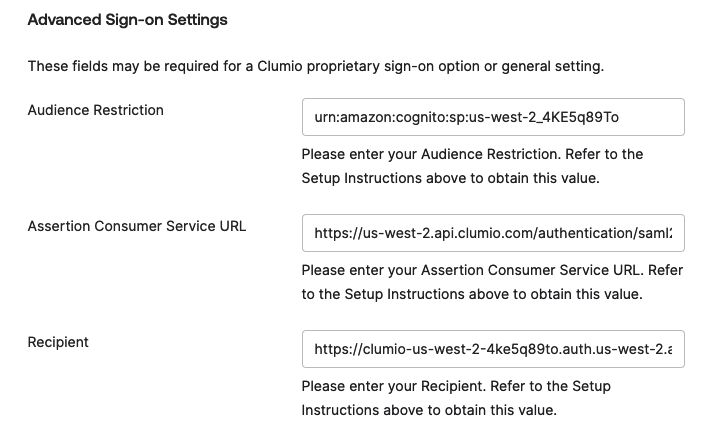
- Click Edit. Under Advanced Sign-on Settings, you will see three fields for Audience Restriction, Assertion Customer Service (ACS) URL, and Recipient URLs.

- Get the Audience Restriction, Assertion Customer Service (ACS) URL, and the Recipient URL from Clumio (see step 4). Copy them here and click Save.
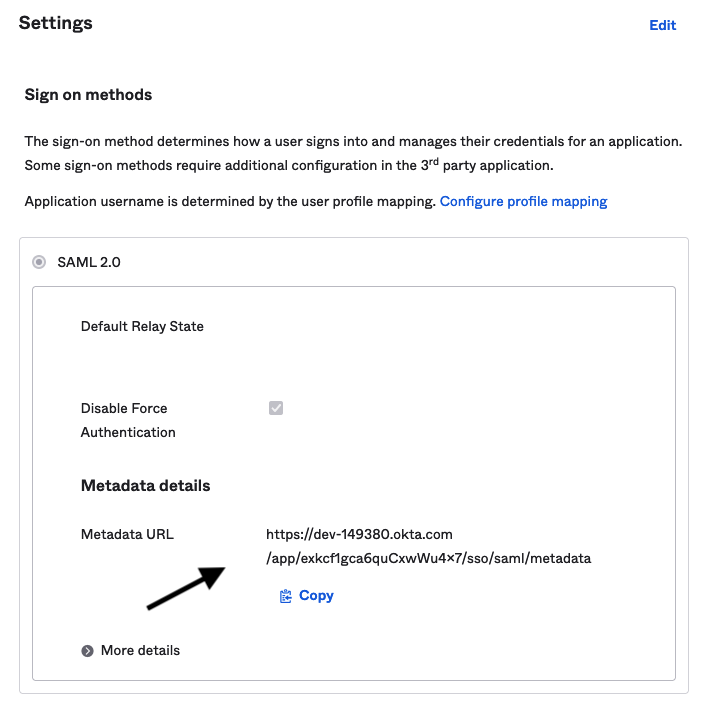
- The metadata URL can be retrieved from the SAML2.0 section under the Sign-On tab. You can either download this and save it as XML or directly use the link within Clumio.

- The Okta side configuration is complete.
In Clumio
- Log on to Clumio.
- Navigate to Administration > Access Management > Authentication (SSO/MFA).
- Click Configure SSO under Strategy.
- Copy the Audience Restriction, Assertion Customer Service (ACS) URL, and the Recipient URL. This is required for the IdP side setup.
- Scroll down and upload the metadata retrieved from the IdP. You can use the URL, upload the metadata XML file, or configure it manually.
- Now click Save Configuration.
- Click Test with my Account, this should open a new tab to test the SSO connection.
- Once the test is successful, click Activate SSO.
This step is important for SSO enablement. - Optionally, enable the check box to send emails to notify all users of the SSO enablement, otherwise click Enable.
Note: For any user to utilize Clumio login through Okta SSO, the user needs to be explicitly added from the Clumio UI; Settings > Access management > Users and should be assigned to the Clumio SAML Application created in Okta.
Contact [email protected] with any questions or concerns.
Updated over 1 year ago