Provisioning users with Okta
Scenario: You use Okta as an IdP and want to provision users into Clumio directly using Okta Groups.
Prerequisites:
- The individual setting up must have Super Admin access to Clumio and Admin access to the Okta portal.
- The individual must be a part of a group that gets Super Admin access within Clumio.
Setup
To enable Super Admin and Admin access, do the following:
- Log on to Okta and navigate to Applications > Clumio.
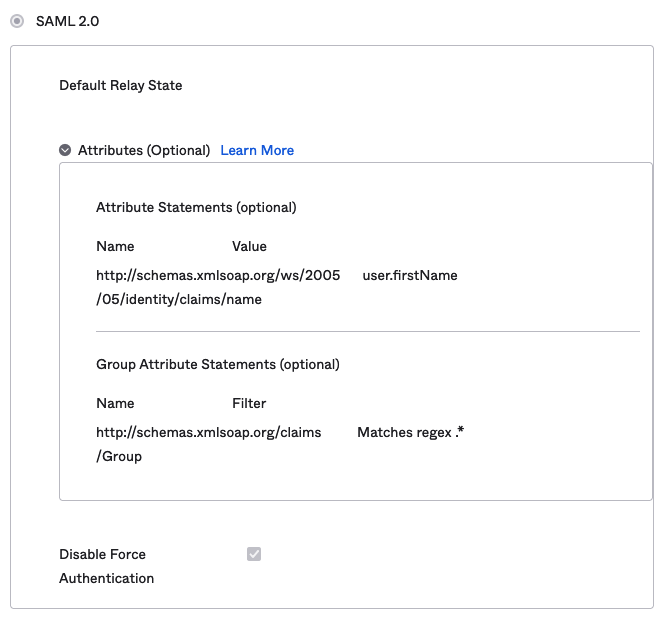
- Under the Sign On settings tab, click Edit and expand Attributes.
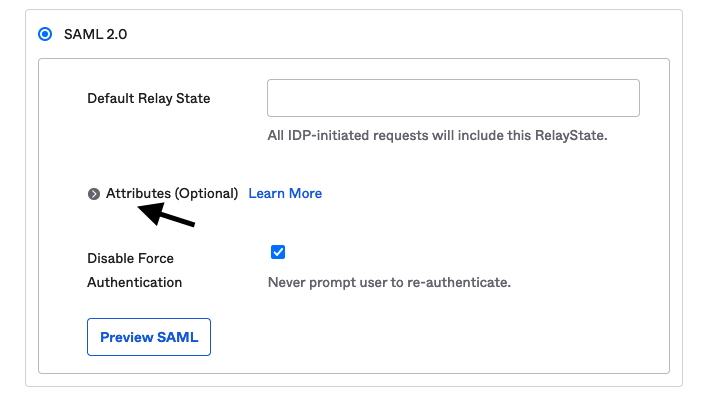
- Add the following to the "Attribute statements" and the "Group Attribute statements" respectively:
⚠️ Note on SAML Group Assertions:
If you're using SAML-based provisioning, please be aware that the SAML assertion has a 2048-character limit. This can be exceeded if too many groups are included in the assertion.
To avoid hitting this limit, please refine your existing group filter to further narrow down the groups passed to Clumio. This ensures that only relevant groups are included in the assertion and avoids exceeding the character limit.
For example:- Filter Type: begins with
- Filter Value: clumio
| Name | Format | Filter | Value |
| http://schemas.xmlsoap.org/ws/2005/05/identity/claims/name | Unspecified | N/A | user.firstName |
| http://schemas.xmlsoap.org/claims/Group | Unspecified | Matches regex | .* |
- Under the Assignments tab, click Assign > Assign to Group and assign the app to the groups you want.
Note: At least one group must have the current user as a member, and this group will get Super Admin permissions within Clumio. - Next, log on to the Clumio portal and navigate to Settings > Access Management > Auto user provisioning.
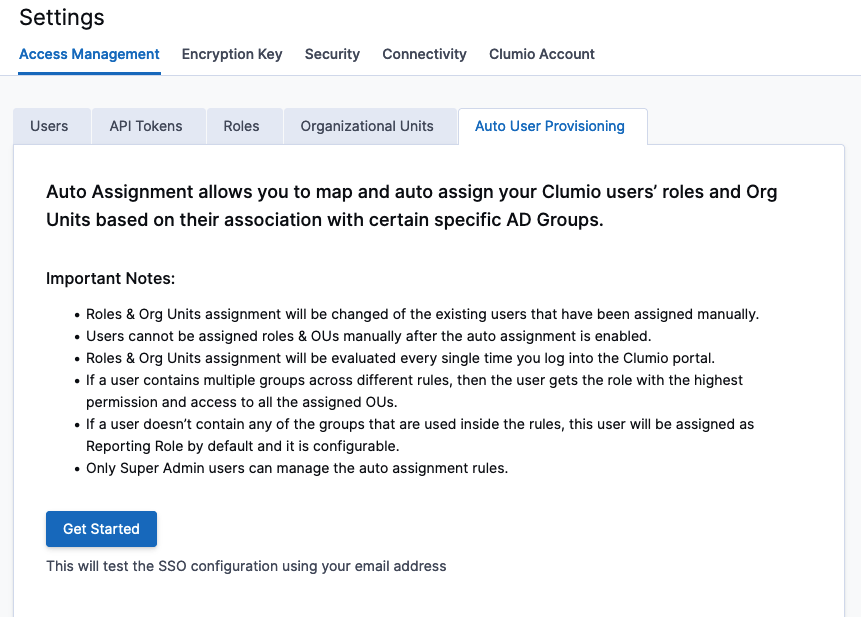
- Click Get Started and type a rule name, select the conditions to apply the rule, give the group a name, select the Super Admin Role, and assign that role to an OU.
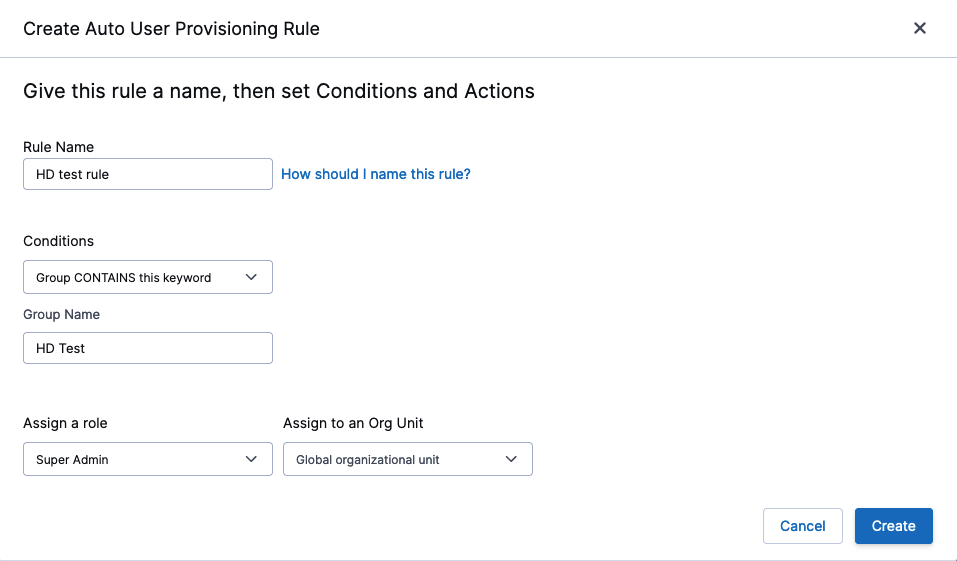
- Ensure that the logged in user is a part of the group that is assigned the Super Admin role.
- Once the first rule has been created, click Enable Auto User Provisioning.
- You can now create additional rules per your requirements by clicking the Create Auto User Provisioning Rule button
Once Auto User Provisioning is enabled, all users are evaluated per the rules you created.
Contact [email protected] with any questions or concerns.
Updated about 1 month ago