Configuring SSO for Google
The Clumio service can integrate with Google for seamless user authentication. Follow the steps below to configure Google IDP as a Single Sign On service for Clumio.
Prerequisites
Ensure that you have the following before you start configuring Google as an IDP:
- Google account with admin privileges
- Clumio account with Super Admin Role
Enable Google integration with Clumio
In Google
- Log into the Google Admin Console
- Navigate to [Apps -> Web and mobile apps].
- Proceed to click on Add custom SAML app.

-
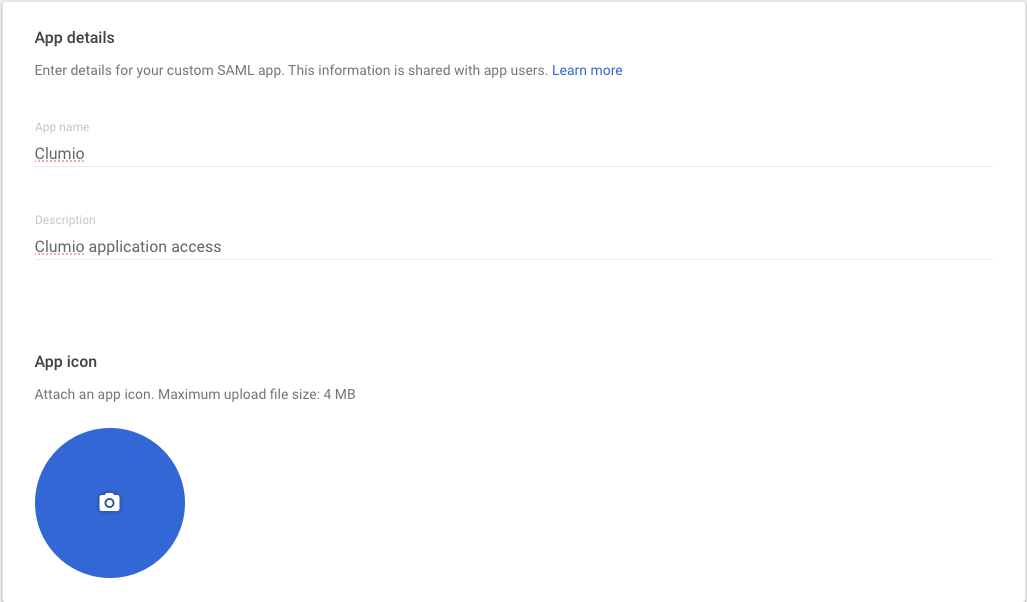
Enter the App Name and click Continue.
-
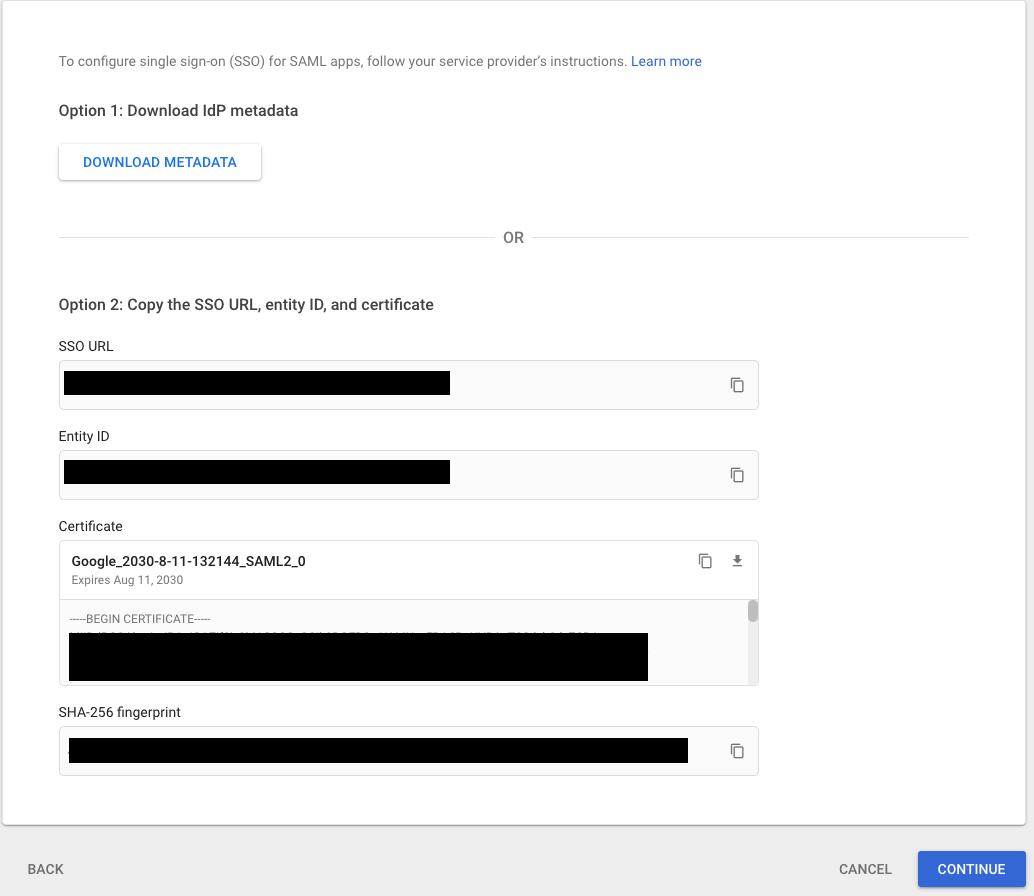
Download Metadata and click Continue.
-
You should see the following screen:
-
From step 4 in the Clumio setup below, copy the:
- Audience restriction to Entity ID
- ACS URL to ACS URL.
-
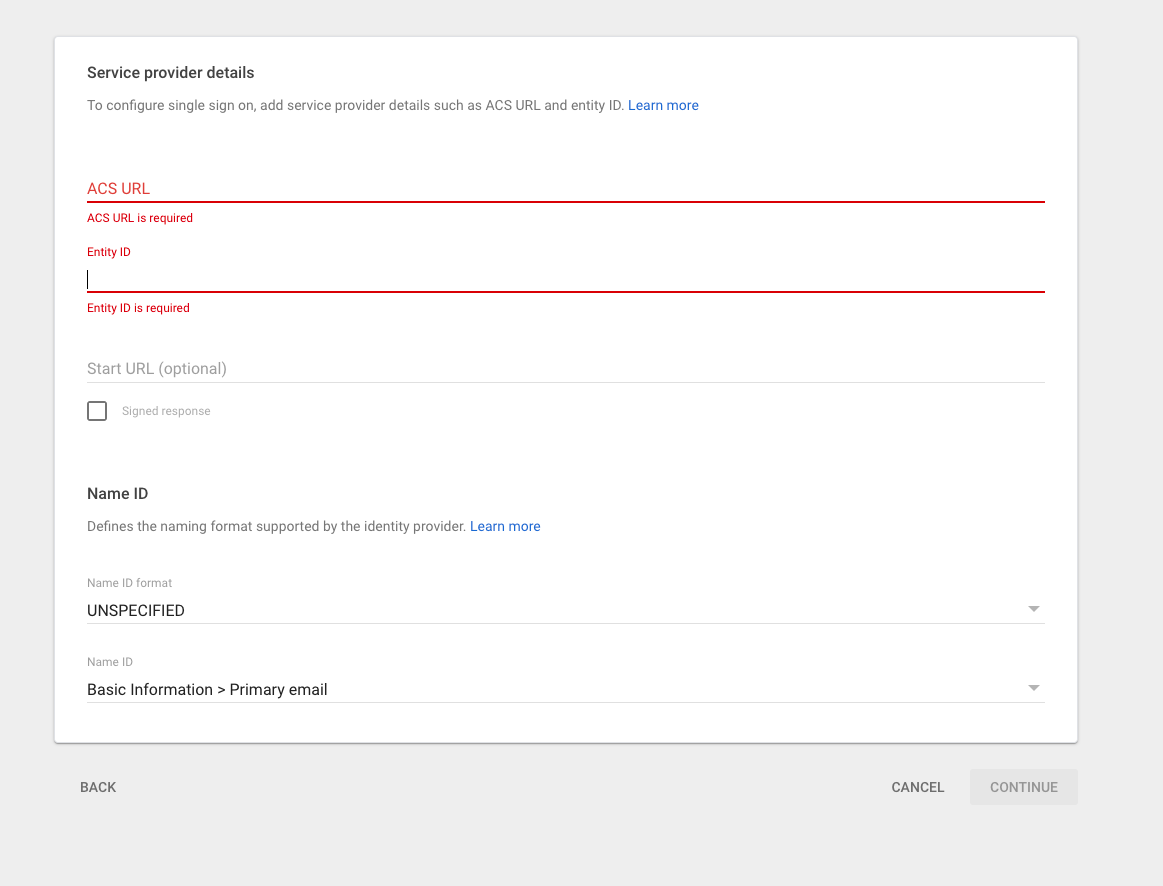
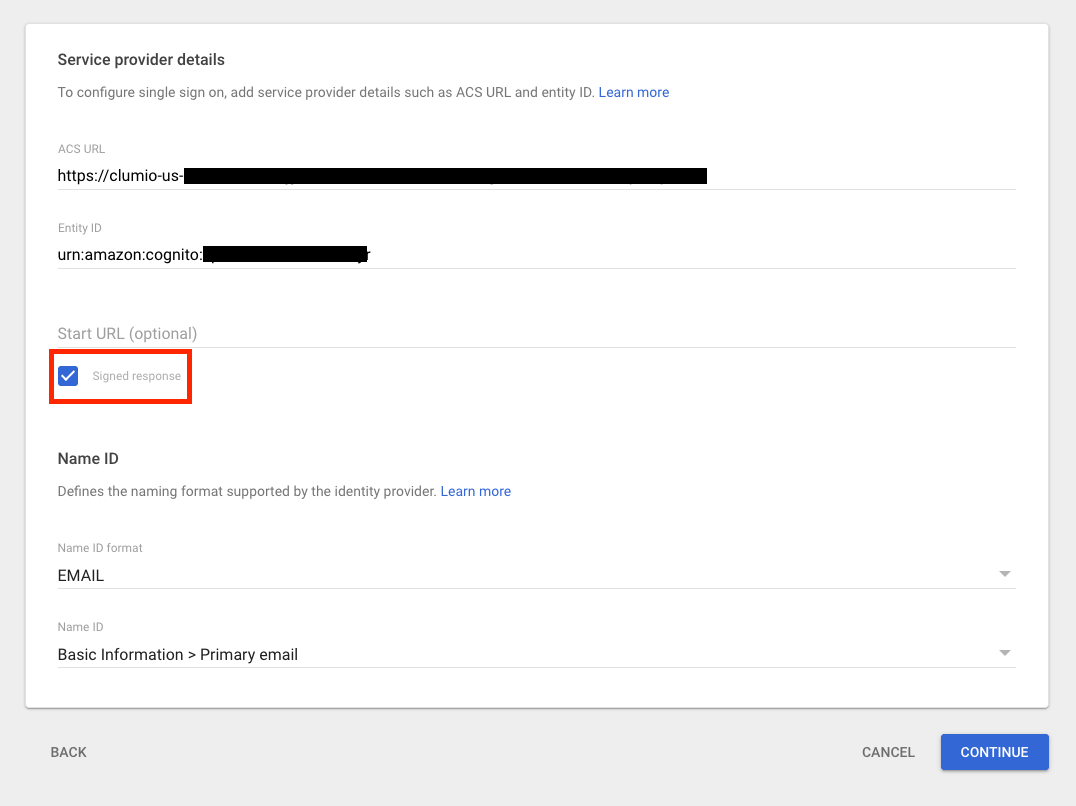
Make sure the Signed Response check box is selected.
-
Click Continue with all the other default settings.
-
Turn on the app for appropriate users or organizational units.
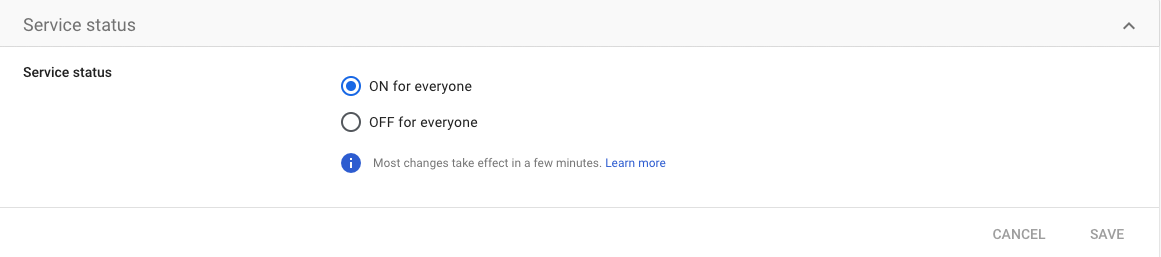
- Click Save and return to the app.
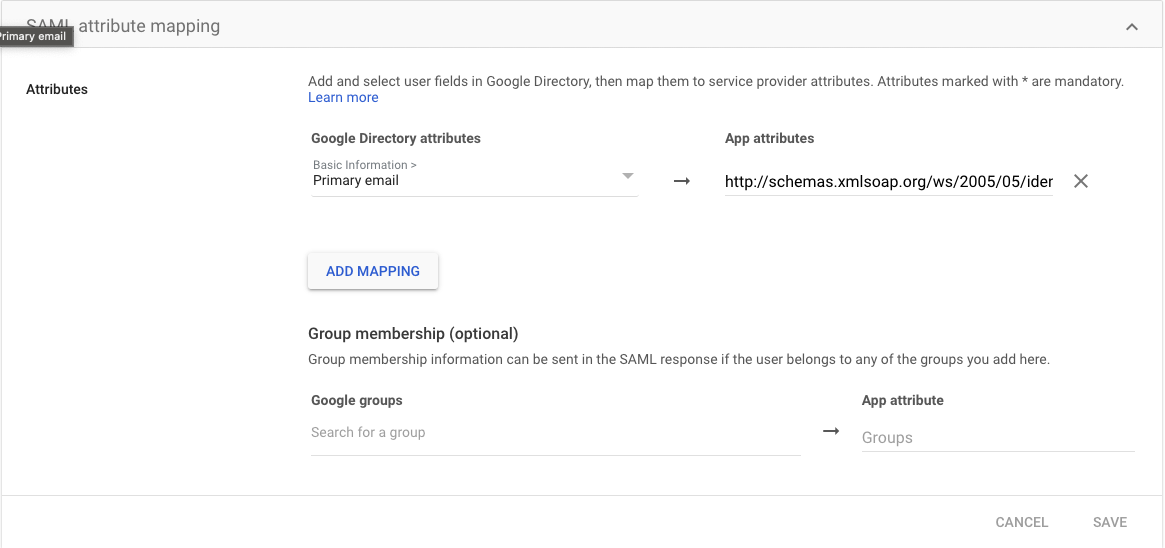
- On the SAML Attribute Mapping screen, make sure that the primary email maps to: http://schemas.xmlsoap.org/ws/2005/05/identity/claims/emailaddress
- Proceed to complete the setup in Clumio.
In Clumio
- Log on to Clumio.
- Navigate to Settings > Access Management > Authentication (SSO/MFA)
- Click Configure SSO.
- Copy the Audience Restriction, Assertion Customer Service (ACS) URL, and the Sign-On URL. This information is needed for step 6 on the IdP side setup.
- Scroll down and upload the metadata retrieved from the IdP. You can use the URL, upload the metadata XML file, or configure it manually.
- Click Save Configuration and then click Test with my Account. This should open a new tab to test the SSO connection.
- Once the connection test is successful, click Activate SSO.
This step is important for SSO enablement. - Optionally, enable the check box to send emails to notify all users of the SSO enablement, or else click Enable.
Note: For any user to utilize Clumio login through Google SSO, the user needs to be explicitly added from the Clumio UI; Settings > Access management > Users.
Contact [email protected] with any questions or concerns.
Updated about 1 month ago